Ubuntu is a Linux distribution that is popular for web development, server hosting, and other applications. PHP is a server-side scripting language that is widely used for web development and is extensively supported on Ubuntu. In this article, we will discuss what are PHP extensions, and the advantages of installing them on Ubuntu. We’ll also discuss the steps on how to install those extensions on Ubuntu.
What is a PHP Extension?
PHP extensions are libraries or modules that can be installed on Ubuntu to enhance the functionalities of PHP and provide it with additional features and capabilities. The extensions are essential for various purposes, such as database connectivity, image processing, handling XML data, and other functionalities. When developers install PHP extensions, they can can streamline their workflow, improve the performance of their applications, and access a lot of tools that make web development on Ubuntu more efficient.
There are many available PHP extensions that can be installed and used on Ubuntu. Some of the popular extensions include:
- MySQL: An extension that allows PHP to communicate with MySQL databases, enabling developers to easily store, retrieve, and manipulate data. An improved version of the MySQL extension is MySQLi, which has been enhanced for database connectivity, improved security, and transaction support.
- GD Graphics: A graphics library that enables PHP to create and manipulate images. Developers can use this extension to generate dynamic images, resize and crop images, and appl various filters and effects.
- OpenSSL: This extension is a cryptographic library that provides secure communication over networks. By installing an OpenSSL extension, PHP applications can implement secure connections, encryption, and digital signatures.
- cURL: This is a library that allows PHP to make HTTP requests and interact with remote servers. This extension is commonly used for getting data from APIs, accessing web servers, and performing file transfers.
Advantages of Installing PHP Extensions on Ubuntu
Installing PHP extensions also known as PHP install on Ubuntu tasks can provide several benefits for users for users who develop PHP applications under the Ubuntu system. The advantages include:
- Functionality expansion: PHP extensions provide a diverse set of functionalities, ranging from accessing various databases to handling imaging processing. Installing extensions ensures that your application can interact with different services and APIs seamlessly.
- Performance optimization: Extensions are often designed to optimize performance, making your PHP applications run faster and more efficiently. This can significantly improve the overall user experience, especially for applications with high traffic.
- Code reusability: Many PHP extensions come with pre-built functions that can be directly integrated into your code. This not only reduces development time but also promotes code readability across projects.
- Compatibility: Certain web applications and frameworks require specific PHP extensions for compatibility. Installing the extensions on your Ubuntu server guarantees a smooth and error-free execution of your code.
How to Install PHP Extensions on Ubuntu
To do the PHP install on Ubuntu task for PHP extensions, do the following steps:
Step 1: Update the package lists
- Updating the package lists will ensure that you have the latest information and access to the most current packages and extensions.
- To update the package lists, run the following command:


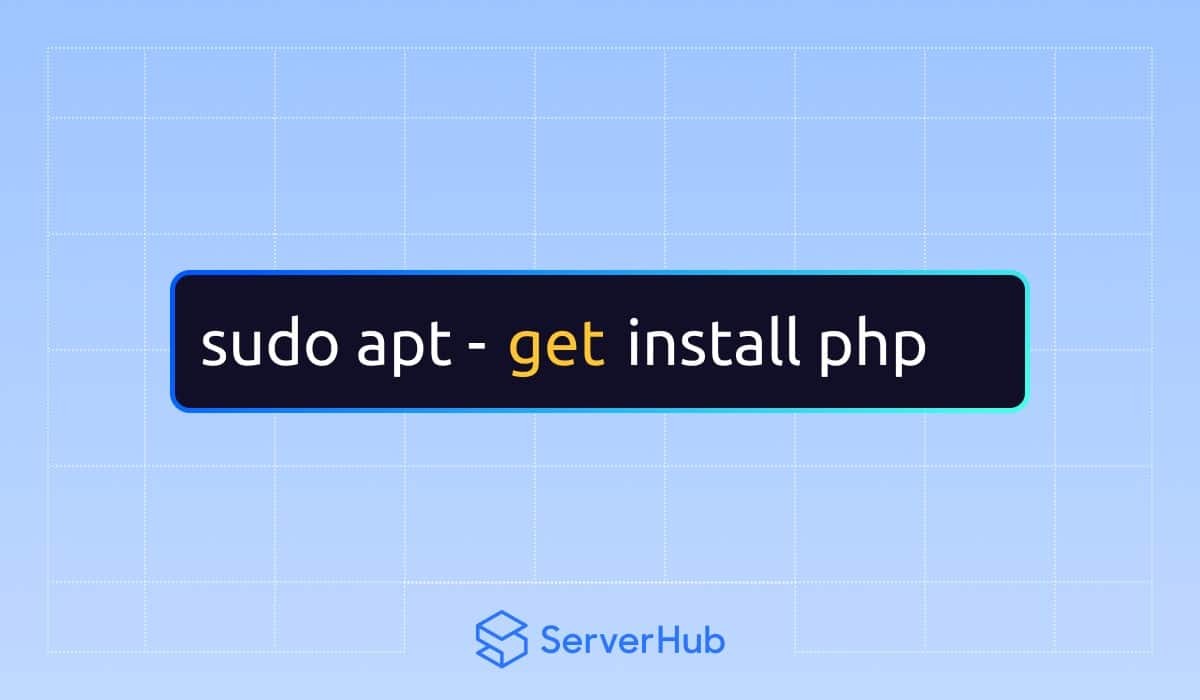
Step 2: Installing PHP
- You need to have PHP installed on your Ubuntu system before installing the PHP extensions. Open the Terminal by searching for “Terminal” in the Dashboard, or by pressing the “Ctrl+Alt+T” on the keyboard.
- In the Terminal, install PHP using the following command:
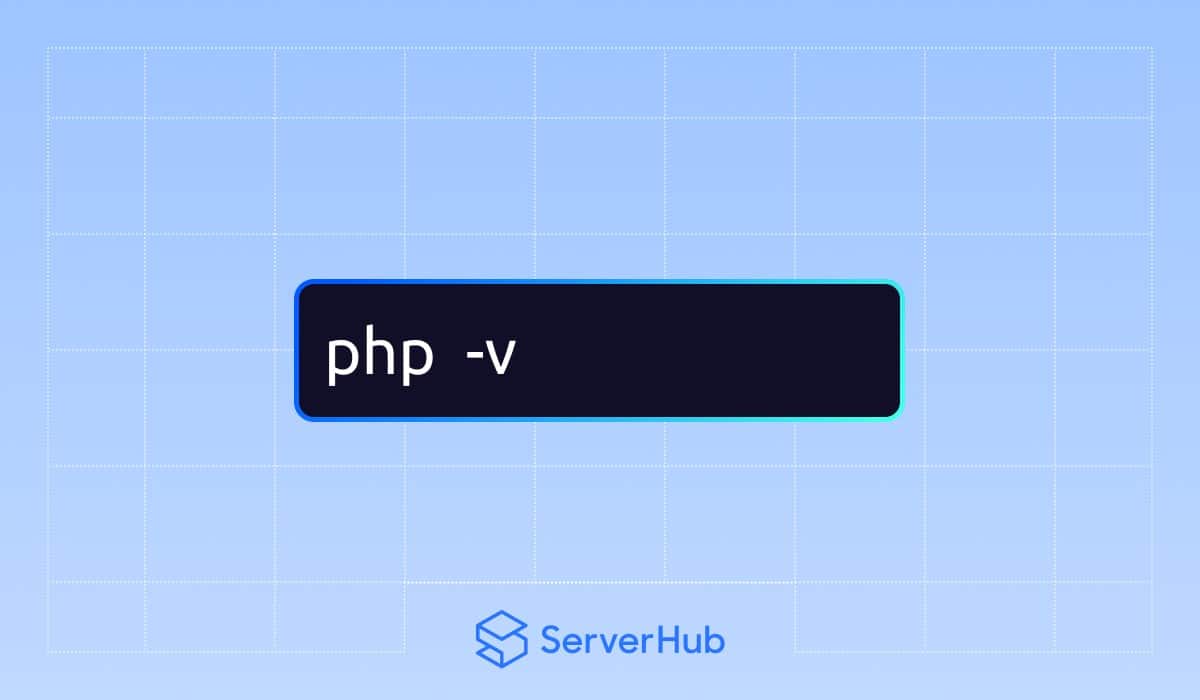
- Run the following command to verify if the installation is successful:
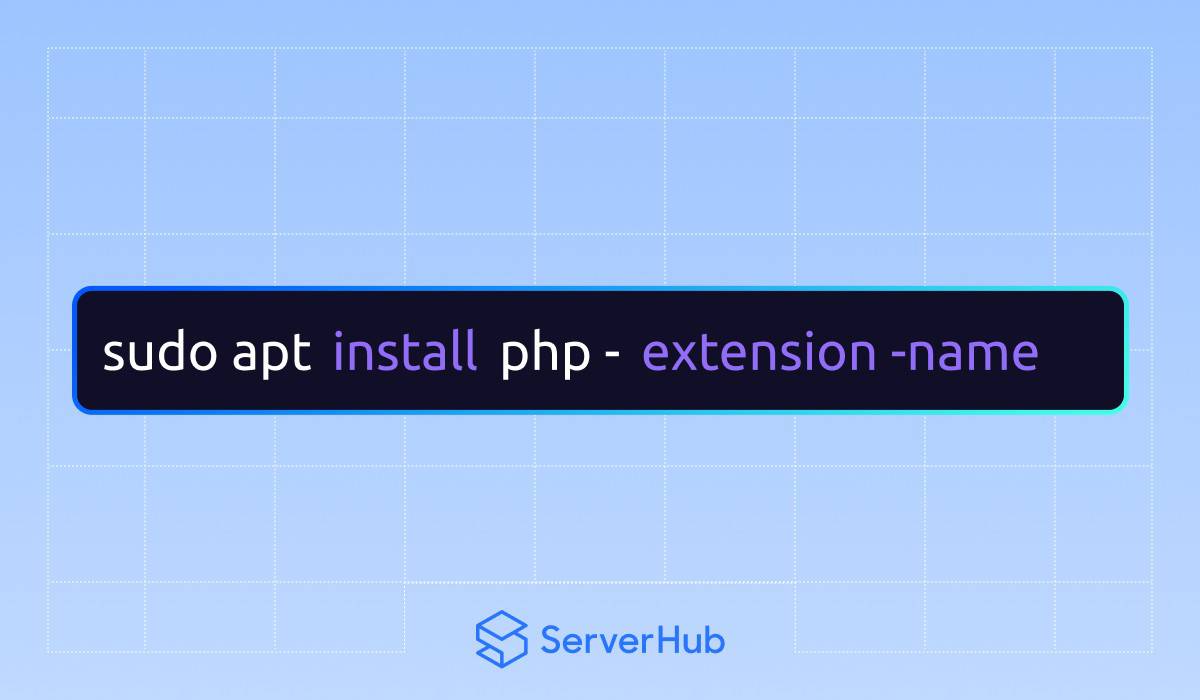
Step 3: Installing the PHP extension
- To install a PHP extension, run the following command:
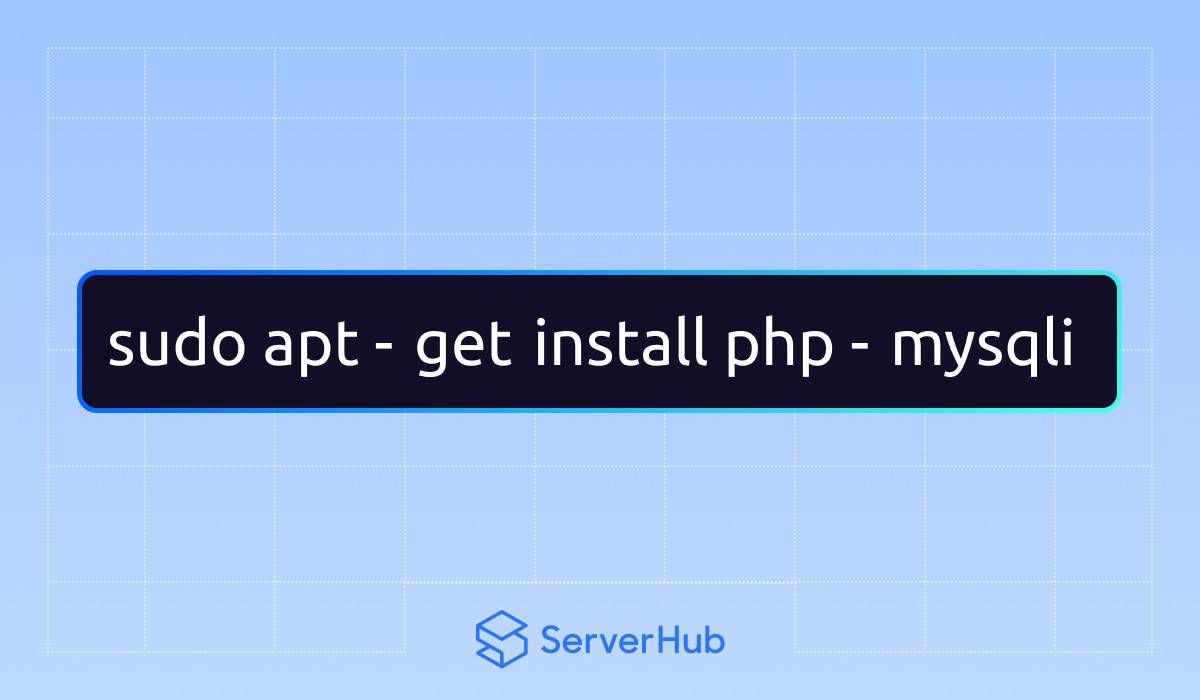
- Replace the “extension name” with the name of the PHP extension you want to install. For example, to install the MySQLi extension, use this command:
- Repeat this method for each specific extension you want to install.
Step 4: Restart the web server
After installing a PHP extension, it is necessary to restart the web server for the changes to take effect. Use any of the following commands for an Apache or Nginx web server:
For Apache web server: 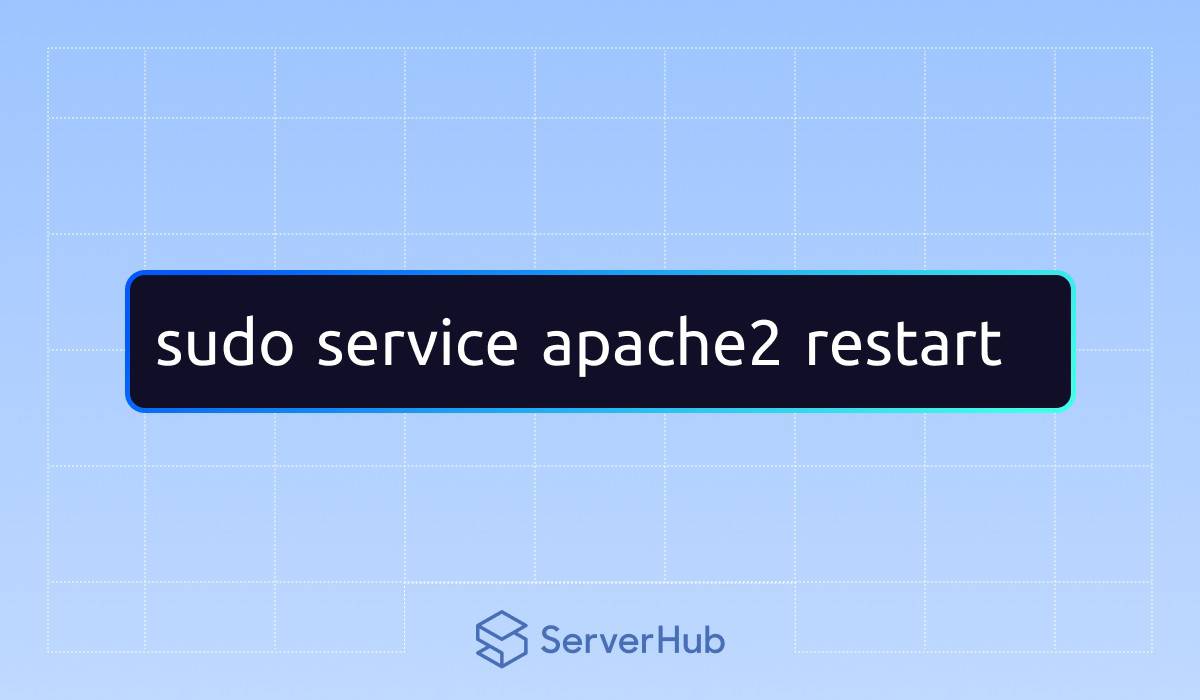
For Nginx web server: 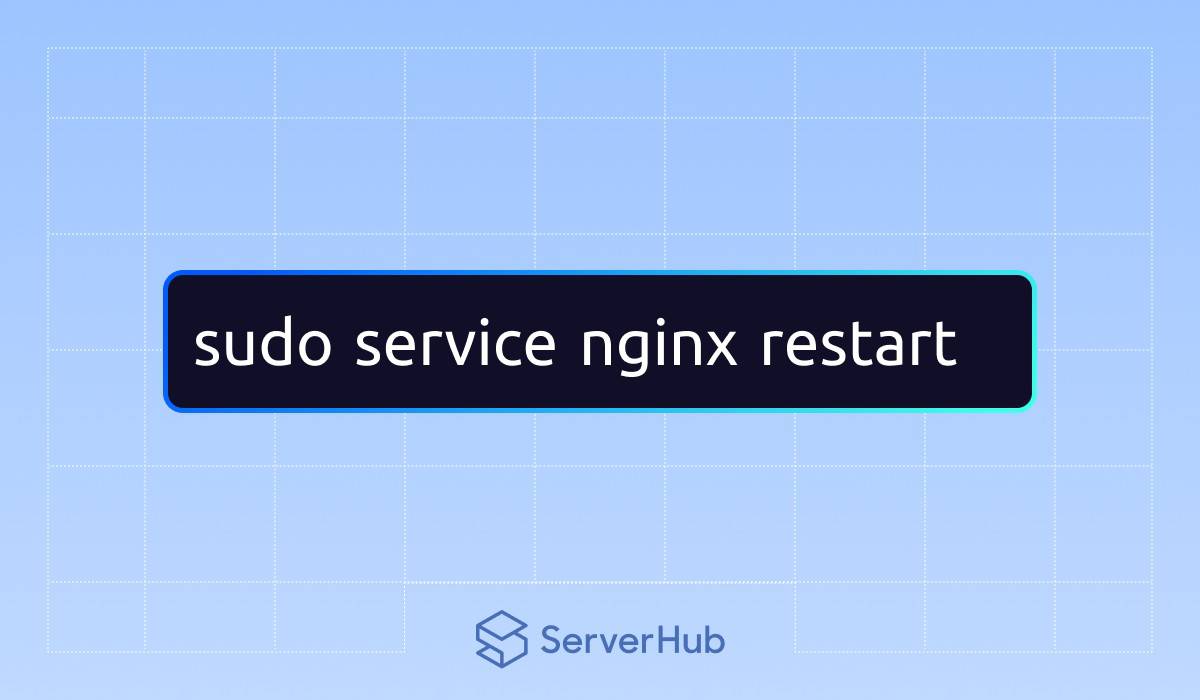
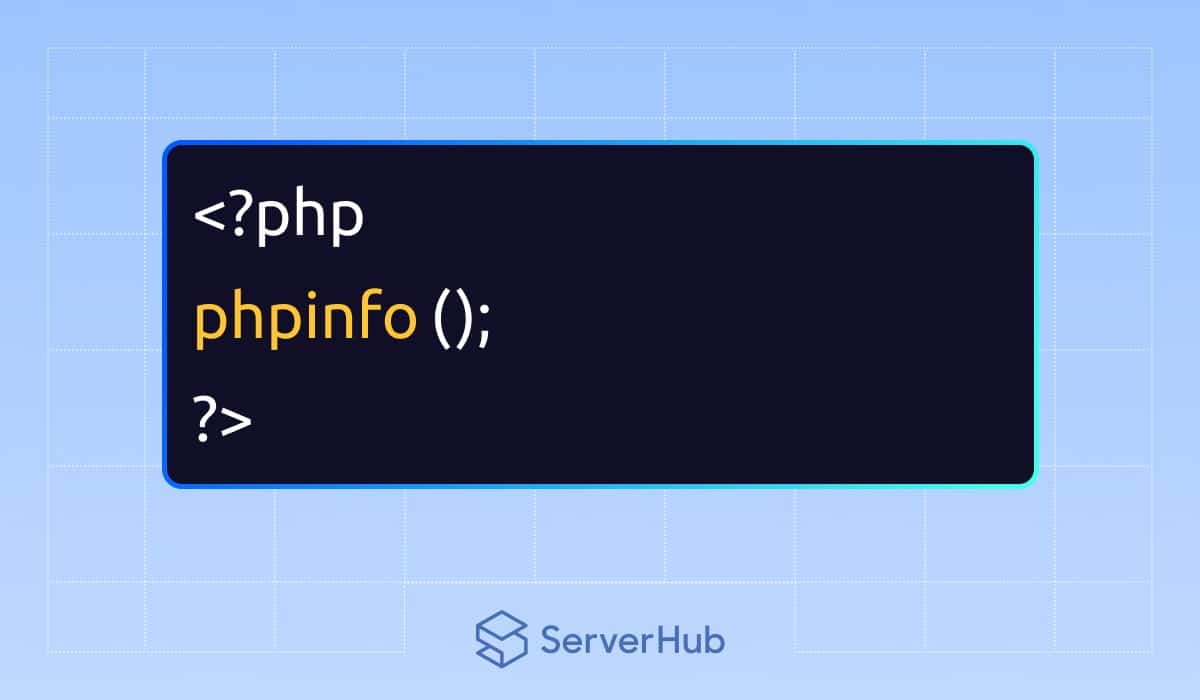
Step 5: Verify the installation
- To confirm that the PHP install on Ubuntu task is successful, you can create a PHP file with the following command:
- Save the PHP file as “phpinfo.php” in your web server’s document root.
- Access the file through a web browser and search for the installed extensions in the resulting PHP information page.
Why PHP Extensions on Ubuntu is Valuable for Developers
In conclusion, PHP extensions play a vital role in enhancing the functionality and performance of PHP applications on Ubuntu. By installing these extensions, developers can unlock a wide range of features and capabilities, simplify development, and ensure compatibility and security, all of which will lead to more robust and efficient web applications. By following the step-by-step guide in this article, you can easily install and utilize PHP extensions on your Ubuntu system, unlock